How to Apply Even Lacquer Coatings on Foil Trays
Why Lacquer Evenness Matters More Than You Think
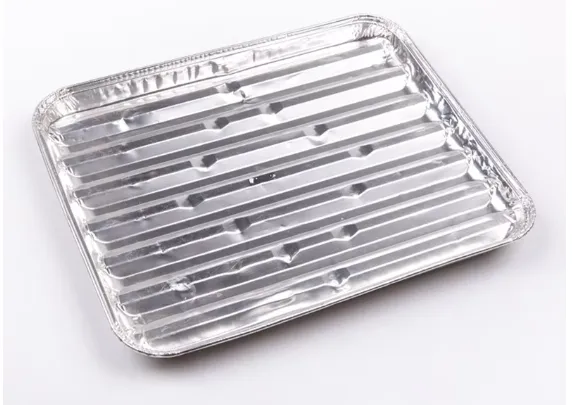
If you've ever seen a foil tray with a patchy, streaky coating, you know the problem. Uneven lacquer isn't just a cosmetic issue—it can cause food to stick, corrosion to start, and your brand to look sloppy. In our factory, we've rejected thousands of trays for exactly this reason. The difference between a tray that performs and one that fails often comes down to a few millimeters of coating thickness.
Let's be clear: applying an even lacquer coating is both a science and an art. It's not something you can eyeball. You need controlled equipment, precise parameters, and rigorous testing. This guide walks you through the exact steps we use on our 12 automated lines to get consistent, food-safe coatings on every single tray.
Step 1: Choose the Right Lacquer for Food Contact
Not all lacquers are created equal. For food-grade aluminum foil, you need a coating that meets FDA 21 CFR 176.170 (for aqueous and fatty foods) and FDA 21 CFR 175.300 (for resinous and polymeric coatings). We typically use epoxy-phenolic or polyester-based lacquers that cure at 180-220°C. These provide excellent adhesion and flexibility—critical when trays are formed under high pressure.
One common mistake is using a lacquer designed for rigid aluminum sheets on thin foil (0.03-0.08mm). It will crack during forming. We've seen it happen. Always ask your supplier for a technical data sheet that specifies elongation at break. For foil trays, you want at least 30% elongation. Also, check if the lacquer is BPA-free—many buyers now require that.
Step 2: Prepare the Surface—Cleanliness is Non-Negotiable
Aluminum foil comes with a thin layer of rolling oil. If you don't remove it, the lacquer won't bond properly. In our plant, we use a two-stage cleaning process: first an alkaline degreaser, then a deionized water rinse. The water must have a resistivity of at least 1 MΩ·cm. We test the surface energy with a dyne pen—it should read at least 38-40 mN/m. If it's lower, you'll get poor wetting and the lacquer will bead up.
Also, control humidity. High humidity can cause condensation on the foil, which leads to pinholes in the coating. We keep our coating room at 50-60% RH. If you're in a humid climate, invest in a dehumidifier. It's a small cost compared to the scrap rate.
Step 3: Select the Coating Method—Roller vs. Spray
For flat foil sheets or rolls, roller coating is the most common. It gives you precise control over thickness and is fast. But for pre-formed trays, you might need spray coating. Spray is good for complex shapes, but it's harder to get uniform coverage—you often get thicker on edges and thinner in the center.
We prefer roller coating for most applications. Our lines run at 100-150 meters per minute, and we can hold thickness within ±1 micron. If you're doing custom shapes, you may need a combination: roller coat the flat sheet, then form the tray. That's what we do for our deep-drawn trays.
Here's a quick comparison:
| Method | Typical Thickness (micron) | Uniformity | Speed (m/min) | Best For |
|---|---|---|---|---|
| Roller (reverse gravure) | 5-10 | ±1 µm | 100-150 | Flat sheets, rolls |
| Spray (airless) | 10-20 | ±3 µm | 10-30 | Pre-formed trays |
| Curtain coating | 15-30 | ±2 µm | 50-100 | Large flat surfaces |
Step 4: Fine-Tune Viscosity and Solids Content
The lacquer's viscosity is your main lever. If it's too thick, you get orange peel. Too thin, and you get runs and sags. We measure viscosity with a Ford cup #4—target is 20-30 seconds at 25°C. But viscosity changes with temperature, so we use a heated tank to keep it at a constant 25°C.
Solids content also matters. A higher solids lacquer (40-50%) means fewer solvents to evaporate, which reduces pinholes. But it also means you need to apply less. We typically apply 6-8 grams per square meter of dry film. That translates to about 5-10 microns depending on solids.
One tip: always stir the lacquer before and during use. Pigments and resins can settle, causing uneven coating. We use a mechanical stirrer at 50 RPM. It's a simple step that prevents a lot of headaches.
Step 5: Control Drying and Curing—Don't Rush It
After coating, the solvent must evaporate before the lacquer cures. We use a three-zone oven: 100°C, 150°C, and 200°C. The total dwell time is about 60 seconds. If you dry too fast, the surface skins over and traps solvent, causing blisters. Too slow, and you waste energy.
Then comes curing. The peak metal temperature should reach 200-220°C for 10-20 seconds. We use a non-contact infrared thermometer to verify. If the temperature is too low, the lacquer won't cross-link, and it will be soft and sticky. Too high, and it will yellow or become brittle.
Here's a common misconception: more heat is better. Actually, over-curing can degrade the lacquer's flexibility, making it crack during forming. We've had customers ask us to crank up the oven to speed things up—we always refuse. Consistency beats speed.
Step 6: Test Adhesion and Flexibility—Before It Leaves the Line
You can't ship out trays without testing. We do a tape pull test (ASTM D3359) right after curing. The coating should have no more than 5% removal. We also do a boiling water test: place the tray in boiling water for 30 minutes, then check for blisters or delamination. And for flexibility, we bend a coated strip 180° over a mandrel—if it cracks, it fails.
For food contact, we also run extraction tests per FDA guidelines. We send samples to an independent lab every quarter. It's not just about compliance—it's about protecting your customers.
Step 7: Quality Control—Inspect, Measure, Document
On our lines, we have in-line thickness gauges that measure the wet film thickness every 10 cm. If it deviates by more than 1 micron, we adjust automatically. But you also need visual inspection. We use high-resolution cameras to spot pinholes, streaks, and bubbles. Any tray that fails is rejected and recycled.
Keep records. For each batch, we log the lacquer lot number, viscosity, oven temperatures, line speed, and test results. That way, if a customer has an issue, we can trace it back. It's also a requirement for ISO 9001 certification, which we've had since 2010.
Frequently Asked Questions
How do I know if my lacquer coating is too thick?
If you see orange peel or a cloudy appearance, it's likely too thick. Also, you can measure dry film thickness with a micrometer—if it's above 10 microns, you're probably overdoing it. Thick coatings are more prone to cracking during forming.
Can I apply lacquer on pre-formed trays?
Yes, but it's harder to get even coverage. Spray coating works, but you'll need to rotate the tray and use multiple passes. We recommend coating the flat sheet before forming for best results. If you must coat after forming, consider a dipping process—though that's messy and less controllable.
What is the shelf life of lacquered foil trays?
If stored properly—in a dry, cool place away from direct sunlight—lacquered trays can last 12-18 months. The lacquer protects against oxidation, but humidity can still cause corrosion at edges. We recommend using them within a year for best performance.
Final Thoughts
Even lacquer coating isn't rocket science, but it requires attention to detail. From choosing the right lacquer to controlling every step of the process, you can achieve consistent results. At Foil Container Factory, we've perfected this over 15 years. We offer custom coating services with free samples for qualified buyers. If you're struggling with uneven coatings, reach out—we're happy to help.
Looking for aluminum foil containers?
We supply food-grade aluminum foil containers for airlines, restaurants and food processors worldwide. Get a free quote today.
Get Free Quote → Browse Products